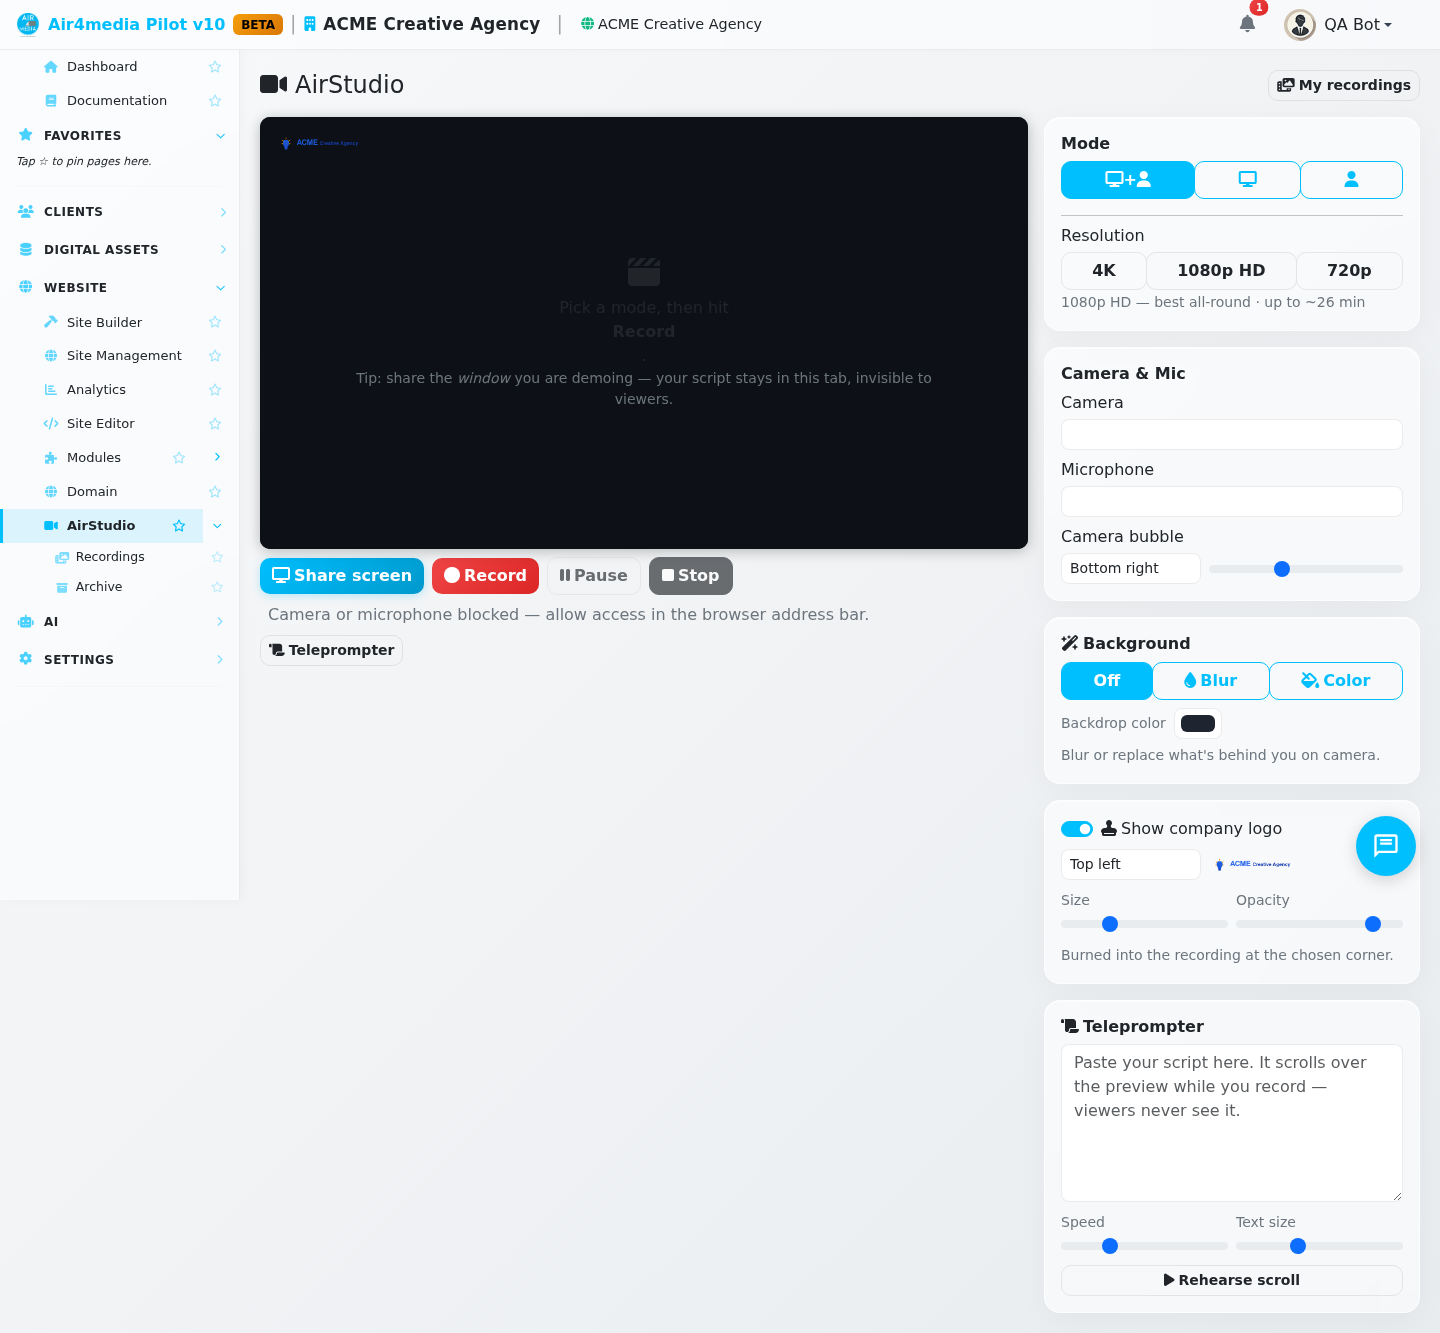
AirStudio
AirStudio is your built-in recording studio — capture your screen, your camera, or both, then build a shareable MP4 library for your team and clients. No app to install, no extra software. Everything happens right in your browser.
Key Features
- Three recording modes: Screen with a camera bubble in the corner, screen only, or camera only as a talking-head video.
- Built-in teleprompter: Paste your script and it scrolls smoothly over the studio preview as you record. Viewers never see it — only you do.
- Background effects: Blur what's behind you on camera, or replace it with a solid color for a clean, professional look. Adjust blur strength with a slider.
- Company logo overlay: Burns ACME Creative Agency's logo directly into the video. Choose which corner it appears in, how large it is, and how transparent.
- Resolution choices: Record at 4K, 1080p HD (the default), or 720p — whatever suits your audience and upload needs.
- Vertical mode: Switch to 9:16 in camera-only mode for content destined for TikTok, Reels, or Shorts.
- Review before saving: After you stop, you watch the full take back before it goes anywhere. Keep it or discard it.
- Recordings library: All your saved videos in one grid, organized into folders. Each card shows the title, duration, and how many times it's been viewed.
- Public share links: Generate a watch link for any recording that opens on acme-creative.air4.media — no login required for the viewer. You can also share an entire folder as a single link.
- Auto transcripts and subtitles: Recordings are transcribed automatically. Viewers can follow along with captions in the player.
- Team notes: Leave notes on any recording for colleagues — useful for feedback rounds or handoff comments.
- Archive: Move older recordings out of your active list without deleting them permanently.
How to Use
- Open AirStudio from the sidebar.
- Choose a recording mode — Screen + Camera is selected by default. Click Share screen to pick the window or browser tab you want to capture.
- Optionally configure your take:
- Paste a script into the Teleprompter box and set the scroll speed and text size.
- Pick a Background effect — blur or a solid color — to clean up what's behind you.
- Toggle Show company logo to watermark every frame with the ACME Creative Agency logo.
- Click Record. A 3-second countdown starts, then you're live. A red timer badge shows elapsed time.
- Use Pause to take a break mid-take, and Stop when you're finished.
- Watch your take in the Review panel that appears below the stage. Give it a title, then click Save to Library — or Discard to start over.
- Click My recordings (top right) to browse your library. From there you can play, rename, share, move into folders, archive, or delete any recording.
Tips
- When doing a screen demo, share the specific window you're presenting — your script tab stays private and off-camera.
- Your mode, resolution, bubble position, background, and teleprompter settings are remembered automatically for your next session.
- To share a set of related videos as one bundle, create a folder, move the recordings into it, and use the folder's share link — clients get a single URL that plays everything.
- A recording showing a spinner is still being processed on the server. It's typically ready within a minute or two.
- Only you can delete your own notes on a recording; notes from colleagues stay unless they remove them.