Airmail is Pilot's email marketing module. Manage subscribers, build campaigns, and track performance — all from one dashboard.
Dashboard Overview
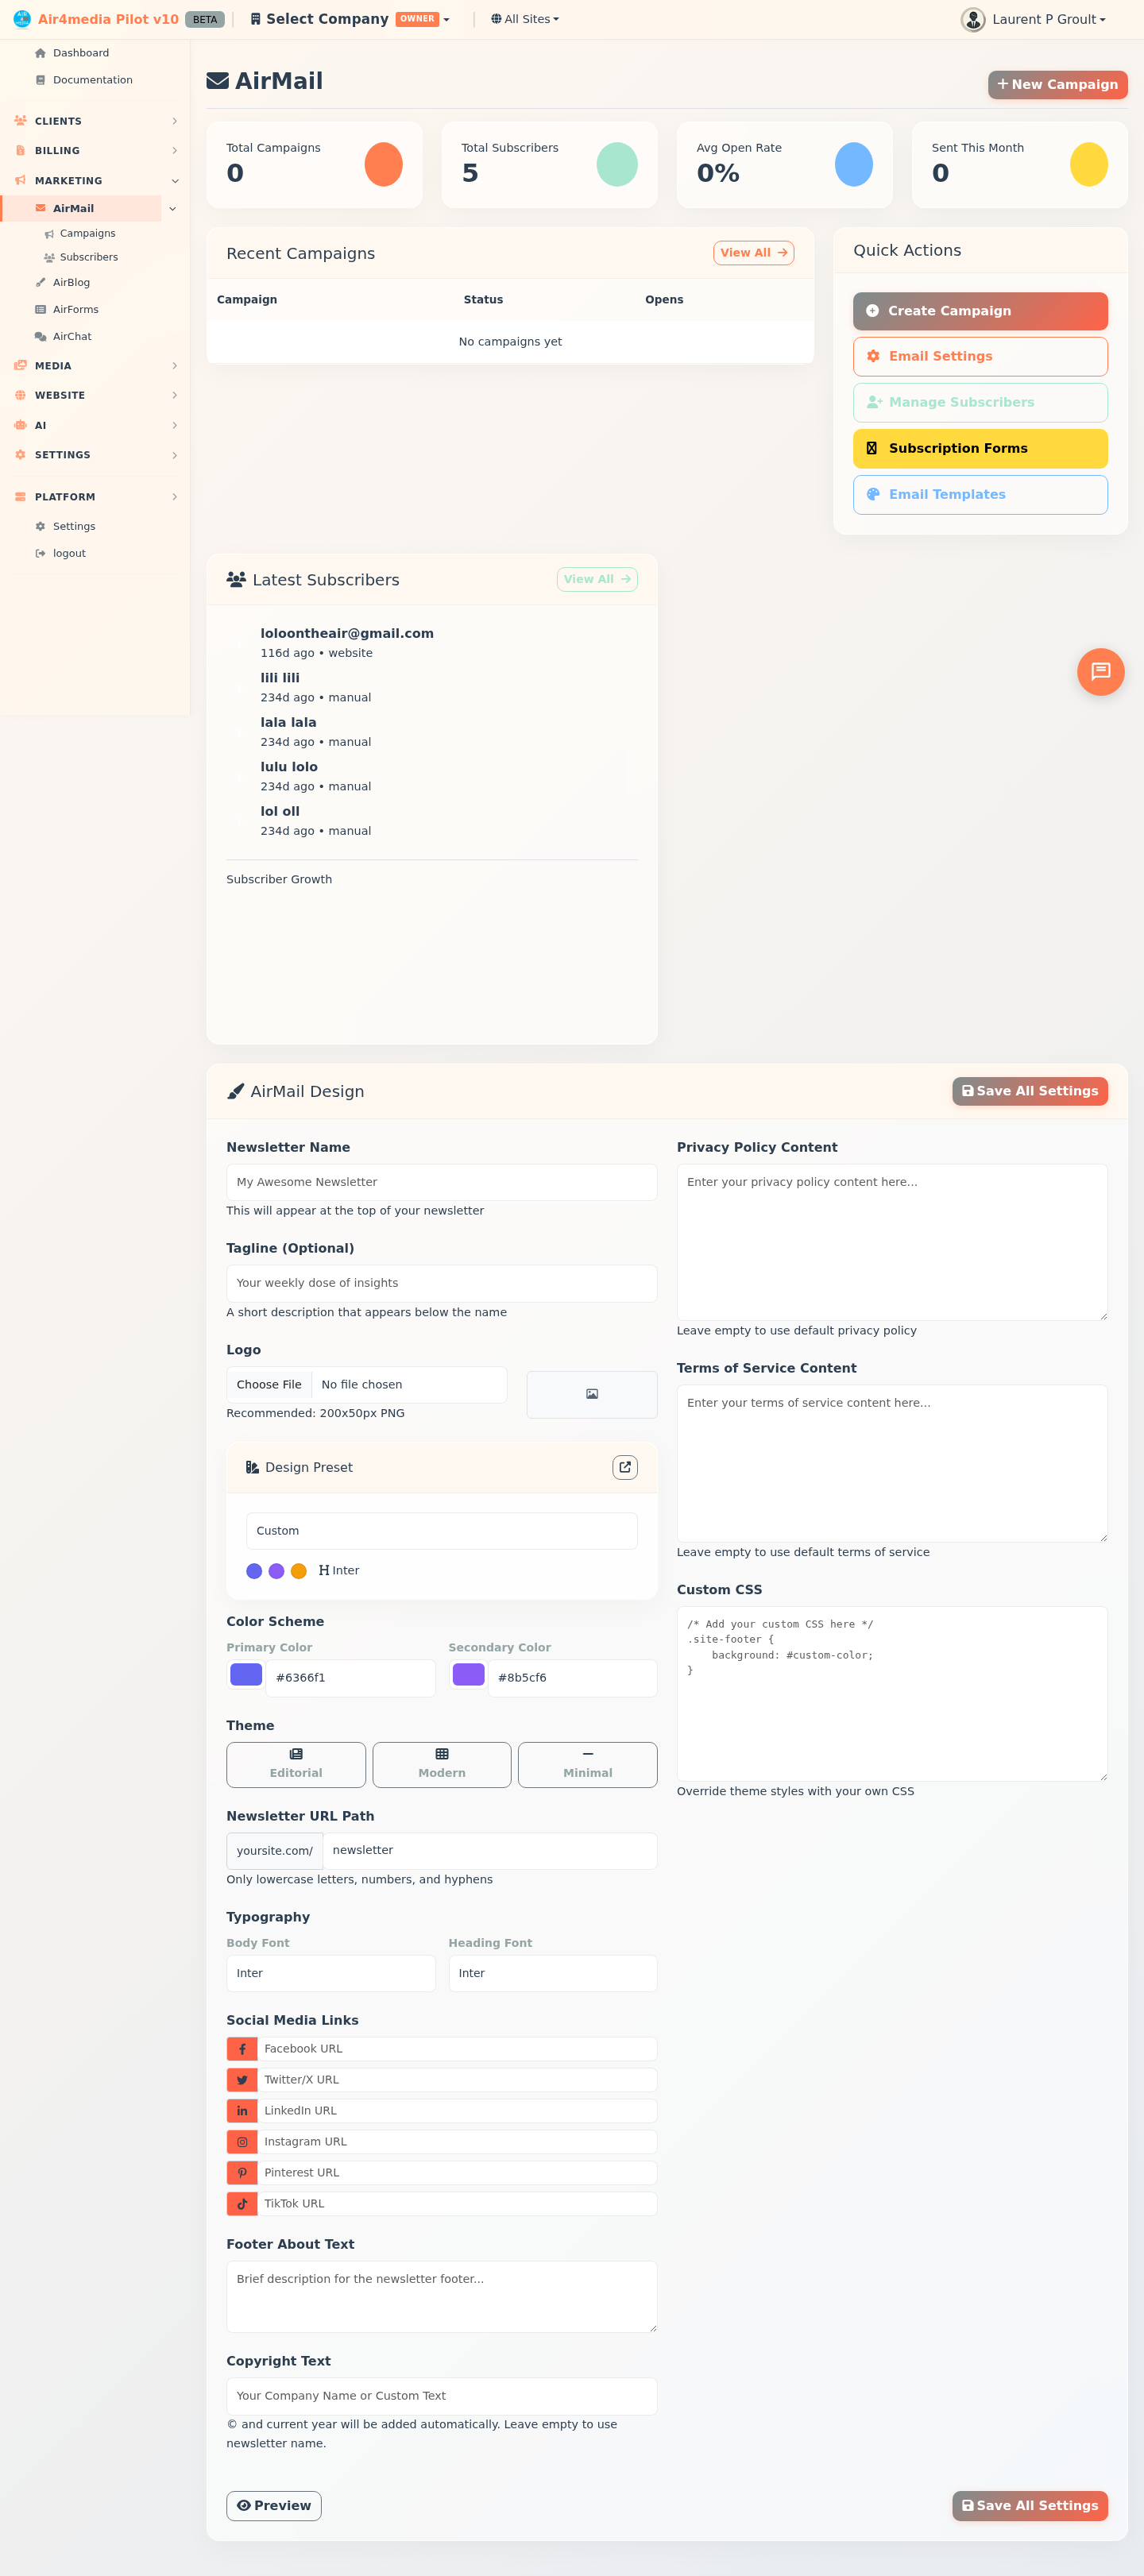
The main Airmail page shows four live stats at the top: total campaigns, active subscribers, average open rate, and emails sent this month. Below that you'll find your five most recent campaigns with their status and open rates, a feed of your latest subscribers with a growth chart, and a Quick Actions bar for jumping to campaigns, subscribers, forms, templates, and email settings.
Key Features
- Campaign Builder: Create newsletters, announcements, welcome emails, and promotions. Set a subject line, preheader text, audience segment, and send immediately or schedule for later.
- Subscriber Management: View and manage your list with full profile data — name, email, phone, source, and status. Filter by all subscribers, active only, or new this month.
- Referral Tracking: Subscribers can refer others to your newsletter. Referred signups are linked back to the person who shared, so you can see who your best advocates are.
- Double Opt-In: New subscribers receive a verification email before joining your list. They can provide their name and phone number during the confirmation step.
- Subscriber Growth Chart: Visual chart showing how your list grows over time.
- Newsletter Design: Customize your public newsletter site — colors, fonts, theme (Editorial, Modern, or Minimal), social links, footer text, and URL path. Includes design presets and custom CSS.
- Email Settings: Configure SMTP for sending campaigns. Quick-setup presets for Gmail, Outlook, Yahoo, and AWS SES. Three tabs: SMTP Configuration, Sender Settings, and Custom Headers.
- Custom Headers: Add email headers for tracking, one-click unsubscribe, priority, or authentication — with template buttons for common setups.
- Public Newsletter Site: Subscribers get a full public site with a newsletter archive, signup form, preferences page, and unsubscribe flow.
- Campaign Analytics: Track opens, clicks, read time, and scroll depth per campaign. Forwarded emails are detected automatically for a fuller picture of reach. View per-subscriber engagement detail from the campaign stats page.
How to Use
- Open Airmail from the sidebar.
- Click New Campaign (top right) or Create Campaign in Quick Actions.
- Fill in the campaign name, type, subject line, and optional preheader text.
- Write your content in the editor, choose your audience segment, and set the send time.
- Click Send Campaign to send immediately, or Save Draft to finish later.
Setting Up Your Newsletter Design
- Scroll to the AirMail Design section on the dashboard.
- Enter your newsletter name and optional tagline. Your logo is pulled automatically from Company Settings.
- Optionally apply a Design Preset for a coordinated color and font style.
- Choose a theme: Editorial, Modern, or Minimal.
- Pick your primary and secondary colors, body font, and heading font.
- Add social media links (Facebook, Twitter/X, LinkedIn, Instagram, Pinterest, TikTok).
- Set the newsletter URL path, footer text, and copyright line.
- Optionally add custom privacy policy, terms of service text, or Custom CSS.
- Click Save All Settings. Use Preview to see how your newsletter site looks.
Configuring Email Settings
- Click Email Settings in Quick Actions.
- On the SMTP Configuration tab, enter your mail server details or click a quick-setup preset.
- Click Test Connection to verify settings.
- Switch to Sender Settings to set the From name, From email, and Reply-To address.
- Use the Custom Headers tab to add tracking, unsubscribe, priority, or authentication headers.
- Click Save Settings.
Tips
- Keep subject lines under 50 characters for best open rates.
- Use the preheader field — it appears as preview text in most email apps.
- The Preview button opens your live newsletter site so you can check how it looks to subscribers.
- If you manage multiple sites, switch between them using the site selector in the top bar — the dashboard updates automatically.
- Adding a one-click unsubscribe header (via Custom Headers) improves deliverability with major email providers.
- Subscribers can update their own name, phone, and category preferences from the preferences page on your newsletter site.
- Open a sent campaign and click Stats to see detailed per-subscriber engagement — who opened, clicked, how long they read, and whether they forwarded it.