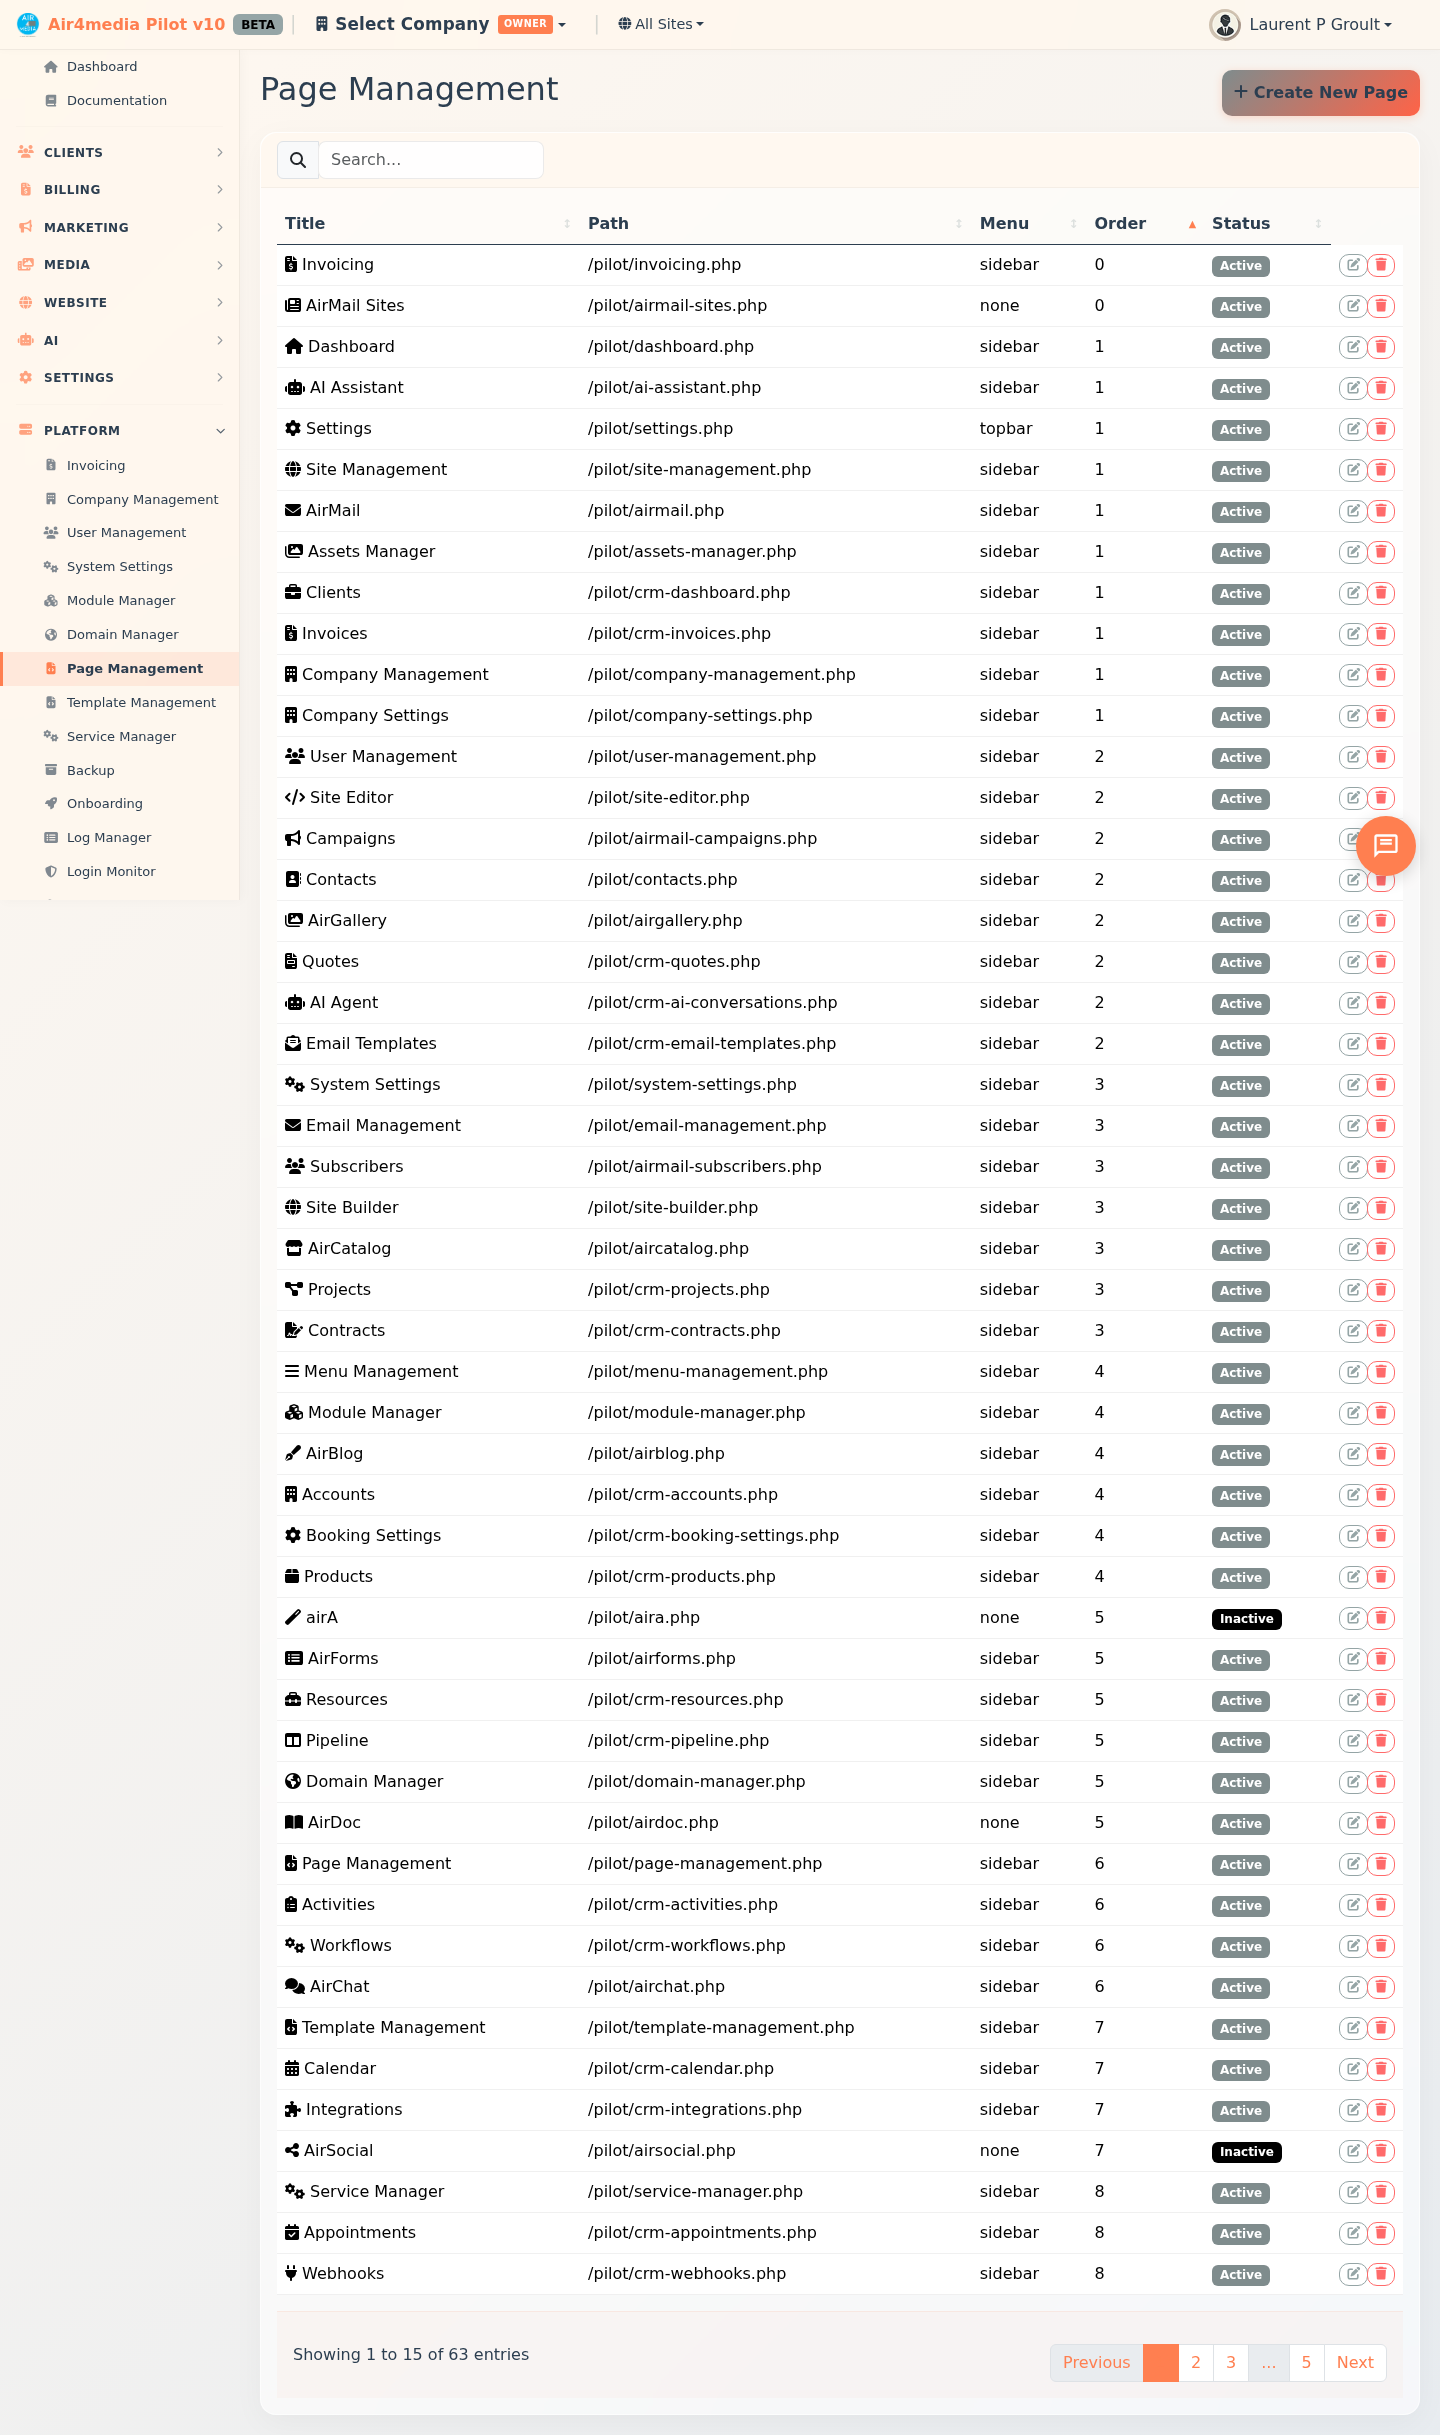
Page Management
Create, configure, and manage all pages within the platform. This admin-only tool controls which pages exist, where they appear in the navigation, and what resources they use.
Key Features
- Page List: View all system pages with their title, path, menu location, display order, and active/inactive status at a glance.
- Create New Pages: A two-step wizard guides you through setting up a new page and automatically generates all required files.
- Template Types: Choose between a Basic Page (standard content display) or a CRUD Page with Database (for managing database records with a built-in list).
- Navigation Control: Assign pages to the sidebar, top bar, or no menu at all.
- Edit Pages: Update a page's name, navigation settings, icon, and associated files — organized into Basic Information, Navigation Settings, and Page Assets sections.
- Deactivate Pages: Removing a page hides it from all menus while preserving its files for recovery.
- Sortable List: Click any column header to sort pages by title, path, menu location, order, or status.
How to Use
Creating a New Page
- Click Create New Page in the top right corner.
- Step 1 — Name and type: Enter a page name and select the template type.
- Choose Basic Page for a standard content page.
- Choose CRUD Page with Database to build a page that manages records from a database table.
- Click Next.
- Step 2 — Settings: Configure the page's navigation and appearance.
- Select a Menu Location: Sidebar, Top Bar, or No Menu.
- Enter an Icon class (e.g.
fas fa-star) to display alongside the menu item. - For CRUD pages, select the Database Table the page will work with. Optionally check Generate List Configuration File to auto-scaffold the list setup.
- Review the auto-generated asset file paths (view, handler, JS, CSS). Add or remove files as needed.
- Click Create Page. The page and all its supporting files are created automatically.
Editing a Page
- Find the page in the list and click Edit.
- The edit form is divided into three sections:
- Basic Information: Edit the page name. The path and template type are shown for reference and cannot be changed.
- Navigation Settings: Update the Menu Location or Icon.
- Page Assets: Add or remove view, handler, JavaScript, CSS, or support files associated with this page.
- Click Save Changes.
Deactivating a Page
- Find the page in the list and click Delete.
- Confirm the action when prompted.
- The page is removed from all menus and marked as inactive. Its files are preserved on the server.
Searching and Sorting
- Use the search bar to filter pages by title, path, or description.
- Click any column header to sort the list. Click again to reverse the sort order.
Tips
- Active vs. Inactive: The Status column shows a green badge for active pages and a red badge for inactive ones. Inactive pages still appear in this list so you can reactivate them if needed.
- Auto-generated paths: When you type a page name in Step 1, the URL path and all asset file names are generated automatically — you rarely need to change them in Step 2.
- CRUD pages and database tables: The database table dropdown is populated from the live database, so only existing tables appear.
- Support files: Support Files track reference or backup files associated with a page but are not loaded when the page runs.